-
Pearl
- Ultimate Contributor

- Posts: 8069
- Joined: Mar 30, 2009
- Location: Deep inside the sea
-
Contact:
Post
by Pearl » Jan 06, 2010 Views: 1777
[center] How to build a block [/center]
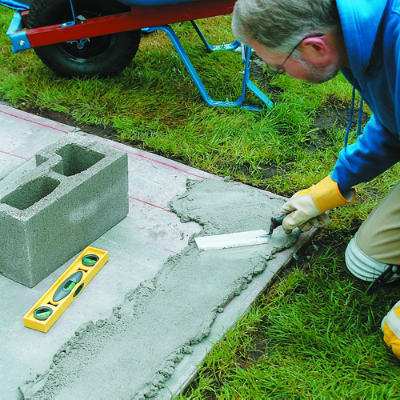
Lay out and spread a bed of mortar
Snap chalk lines that are a consistent distance ― 1 or 2 inches ― from each side of the blocks. Use a pencil to mark the openings exactly, then double-check that the openings are the correct width. Use a framing square to check the corners. Dampen the slab. Mix a batch of mortar and spread a layer about ½ inch thick in between the layout lines.
Snap chalk lines that are a consistent distance ― 1 or 2 inches ― from each side of the blocks. Use a pencil to mark the openings exactly, then double-check that the openings are the correct width. Use a framing square to check the corners. Dampen the slab. Mix a batch of mortar and spread a layer about ½ inch thick in between the layout lines.
-
Pearl
- Ultimate Contributor
- Posts: 8069
- Joined: Mar 30, 2009
- Location: Deep inside the sea
-
Contact:
Post
by Pearl » Jan 06, 2010
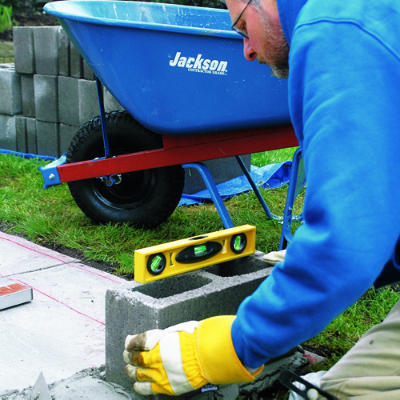
Bed and level the first block
Set an end block or a half block in the mortar bed, centered between the chalk lines and exactly aligned with the end line. (You may need to scrape away mortar to see the line.)
Press it into place so that the mortar is about 3⁄8 inch thick. Check the block for level in both directions and check the face of the end for plumb. Scrape away excess mortar and use it for the next block
-
Pearl
- Ultimate Contributor
- Posts: 8069
- Joined: Mar 30, 2009
- Location: Deep inside the sea
-
Contact:
Post
by Pearl » Jan 06, 2010
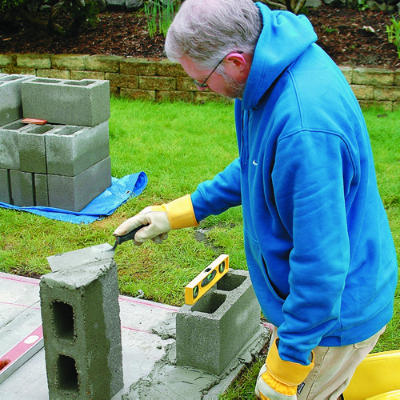
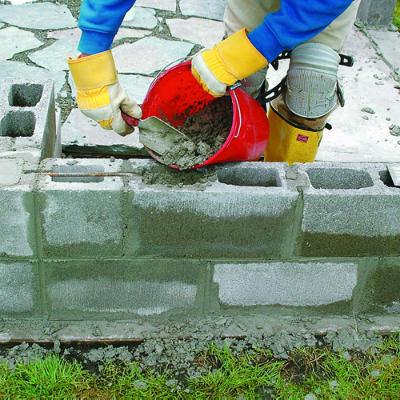
Butter a block end
Scrape mortar onto the end (or the end webs, if you are using webbed stringers) of the next block to form peaks as shown. On a long wall, you should set an end block at the other end first, then set up a string line and fill in between the two blocks (see step 7).
For a short wall like this, simply set the blocks in order.
-
Pearl
- Ultimate Contributor
- Posts: 8069
- Joined: Mar 30, 2009
- Location: Deep inside the sea
-
Contact:
Post
by Pearl » Jan 06, 2010
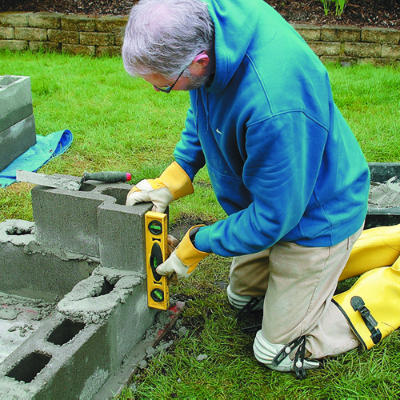
Check for straightness and level
Set the next block in place and push it against the first block so that the joint between them is about 3⁄8 inch. Check the block for level.
Scrape mortar onto the flanges of the laid blocks and set the next course of blocks on top. Start the next row with a corner block or a half block, so the blocks will be stacked one on top of two. Check this row for level and see that the blocks form a straight line. Scrape mortar from the joints as you work.
-
Pearl
- Ultimate Contributor
- Posts: 8069
- Joined: Mar 30, 2009
- Location: Deep inside the sea
-
Contact:
Post
by Pearl » Jan 06, 2010
Tie a corner together
If you don’t use corner blocks, you can use this method. Where two walls adjoin, use a circular saw with a masonry blade to cut channels in the tops of the blocks. Bend a piece of rebar to fit. Fill the cells with mortar and set the rebar in the mortar.
Do this every other course.
-
Pearl
- Ultimate Contributor
- Posts: 8069
- Joined: Mar 30, 2009
- Location: Deep inside the sea
-
Contact:
Post
by Pearl » Jan 06, 2010
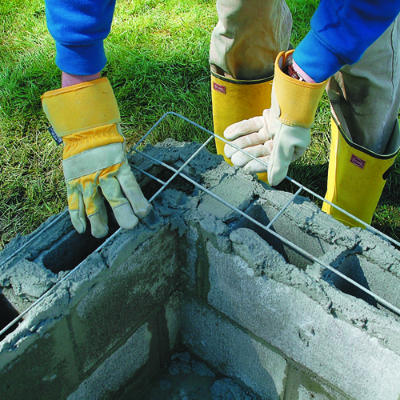
Reinforce with ladder wire
To strengthen a wall, and perhaps a corner as well, add ladder wire every other course and under the top course. Spread a layer of mortar onto all the webs and set the wire in the mortar.
Last edited by
Pearl on Jan 13, 2010, edited 1 time in total.
-
ujala
- Ultimate Contributor
- Posts: 18532
- Joined: Jan 31, 2009
- Location: Islamabad
-
Contact:
Post
by ujala » Jan 07, 2010
very nice
-
Pearl
- Ultimate Contributor
- Posts: 8069
- Joined: Mar 30, 2009
- Location: Deep inside the sea
-
Contact:
Post
by Pearl » Jan 13, 2010
ujala wrote:very nice
thanks ujala