-
Pearl
- Ultimate Contributor

- Posts: 8069
- Joined: Mar 30, 2009
- Location: Deep inside the sea
-
Contact:
Post
by Pearl » Jan 13, 2010 Views: 1178
[center] How to build a block [/center]
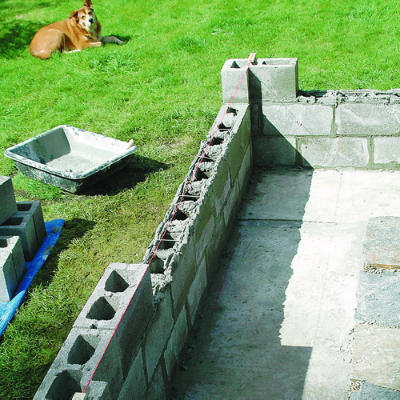
Use a line guide for a long wall
On a long wall, set the blocks at each end, then attach mason's line to a corner block at each end and pull it taut.
Install the intervening blocks so they nearly touch the line. The line can serve as a guide for level as well as straightness along the wall’s side.
-
ujala
- Ultimate Contributor
- Posts: 18532
- Joined: Jan 31, 2009
- Location: Islamabad
-
Contact:
Post
by ujala » Jan 14, 2010
very nice
-
Pearl
- Ultimate Contributor
- Posts: 8069
- Joined: Mar 30, 2009
- Location: Deep inside the sea
-
Contact:
Post
by Pearl » Jan 16, 2010
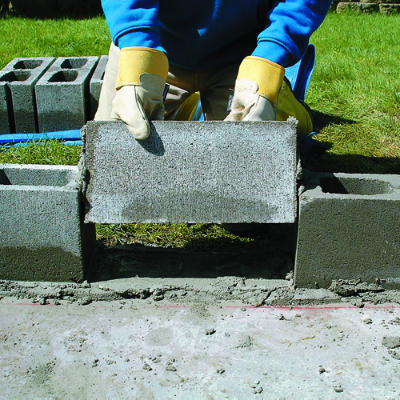
Finish a long wall with a closure block
The last block on a long wall, called the closure block, is a bit tricky to install.
If you need to cut a block, cut the next-to-last block and then install a full-sized closure block. Spread a thick layer of mortar onto both ends of the closure block. Align it precisely with the center of the opening and carefully slide it straight down into place. If mortar peels off one of the ends, pick the closure block up, r eapply mortar, and try again.
-
Pearl
- Ultimate Contributor
- Posts: 8069
- Joined: Mar 30, 2009
- Location: Deep inside the sea
-
Contact:
Post
by Pearl » Jan 16, 2010
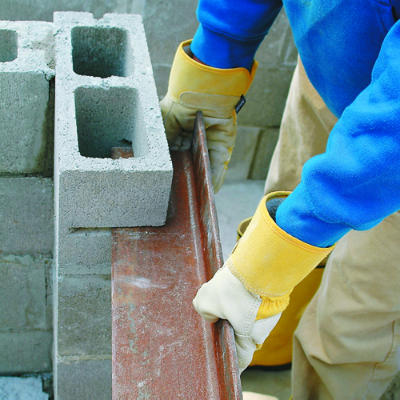
Install an angle iron
At a lintel (the top of an opening), install an angle iron for support. If possible, plan the installation so you can set the angle iron on top of a block at each side of the opening.
If that is not possible, use a circular saw equipped with a masonry blade to cut a channel that you can slide the lintel into. Mark and cut carefully so the angle iron will be level. The masonry saw blade makes a cut that is just thick enough for the angle iron.
-
Pearl
- Ultimate Contributor
- Posts: 8069
- Joined: Mar 30, 2009
- Location: Deep inside the sea
-
Contact:
Post
by Pearl » Jan 16, 2010
Finish a lintel
Fill the cells on each side of the opening to cement the angle iron in place. Spread mortar and install blocks on the angle iron.

-
Pearl
- Ultimate Contributor
- Posts: 8069
- Joined: Mar 30, 2009
- Location: Deep inside the sea
-
Contact:
Post
by Pearl » Jan 16, 2010
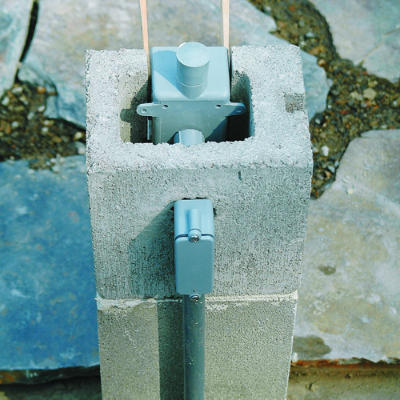
Install an electrical box
Electrical conduit should run inside the counter, rather than through the block cells, wherever possible. To install an electrical box on the outside of the counter, cut an opening for the box using a circular saw and set the box in so it protrudes the thickness of whatever finish material you will use.
Drill a hole for the conduit using a masonry bit. Draw a circle for the conduit's hole, drill six or seven holes along its circumference, then chip out the hole using a small masonry bit. Run conduit to the box using an elbow to make the turn. Tap in shims to wedge the box in place. Stuff newspapers into the cell about 6 inches below the electrical box, then fill the area around the box with concrete to hold the box firmly in place.
-
Pearl
- Ultimate Contributor
- Posts: 8069
- Joined: Mar 30, 2009
- Location: Deep inside the sea
-
Contact:
Post
by Pearl » Jan 16, 2010
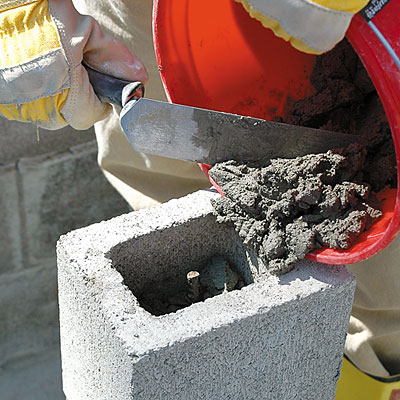
Strengthen a wall by filling it
A narrow wall section like this can be strengthened with concrete and rebar in one or more block cells. Mix a batch of concrete that is wet enough to pour easily. Pour in a foot or so of concrete. Cut a piece of rebar to the height of the wall minus an inch or so and insert it into the center of the cell. Fill the cell the rest of the way with concrete. For extra strength, you can use this method on some or even all of the cells.
-
Pearl
- Ultimate Contributor
- Posts: 8069
- Joined: Mar 30, 2009
- Location: Deep inside the sea
-
Contact:
Post
by Pearl » Jan 16, 2010
ujala wrote:very nice
thanks ujala